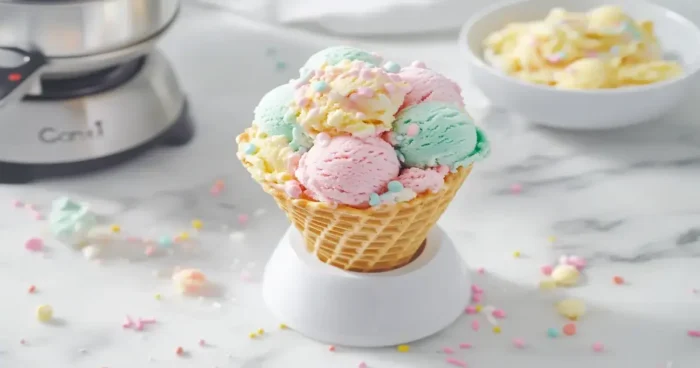
There’s something magical about creating your own delicious treats at home, and this waffle cone recipe is here to prove it! Imagine the crisp, golden cone that perfectly holds your favorite scoop of ice cream – it’s easier to make than you might think. First, you’ll love the simple ingredients – no complicated or hard-to-find items. Plus, it’s a healthier, fresher alternative to store-bought cones. Next, this recipe’s versatility will have you hooked; you can add fun flavors or even experiment with creative mix-ins. In addition, making waffle cones is a rewarding little challenge that adds a personal touch to your dessert. So why wait? Dive into this easy, fun, and oh-so-tasty recipe. You’re just a few steps away from enjoying a homemade treat that will make every dessert special – keep reading to learn how!
How to Make a Classic Waffle Cone at Home
Essential Ingredients for a Waffle Cone Recipe

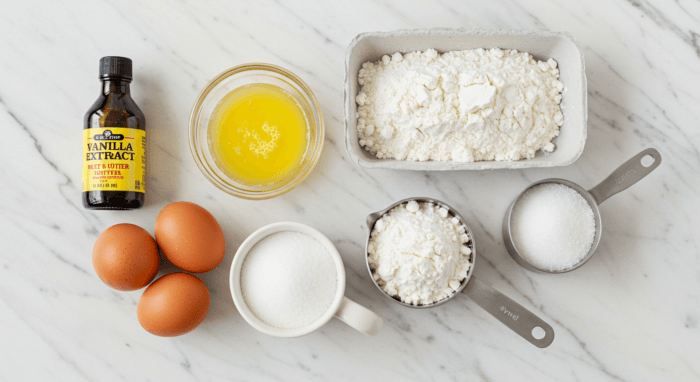
The foundation of any great waffle cone is simple, wholesome ingredients. To make your own at home, you’ll need basic pantry staples like flour, sugar, eggs, and butter. First, be sure to use all-purpose flour for the best texture. Then, granulated sugar adds that sweet crunch you love in a waffle cone. Also, eggs are essential for binding everything together and adding richness. In addition, melted butter gives your cones a delightful golden color and buttery taste. For flavor, a splash of vanilla extract works wonders. If you like, you can also add a pinch of salt to balance the sweetness. With just these few ingredients, you’re on your way to creating the perfect homemade waffle cone recipe. It’s fun, easy, and surprisingly rewarding! Once you’ve gathered everything, you’ll be ready to mix up your batter and start creating crispy cones right in your kitchen.
Step-by-Step Guide to Preparing the Batter

Making waffle cone batter is easier than you think! First, grab a mixing bowl and whisk together your eggs and sugar until they’re light and fluffy. Next, add in your melted butter and vanilla extract, stirring until smooth. Then, slowly fold in the flour and salt, making sure to avoid overmixing. This ensures your batter stays light and airy. The consistency should be smooth and pourable, like pancake batter. If it feels too thick, you can add a splash of milk to loosen it up. Once your batter is ready, preheat your waffle cone maker or pan. In addition, give it a light grease with butter or cooking spray to prevent sticking. With the batter prepared, you’re just a few minutes away from enjoying delicious homemade cones. Trust me, this waffle cone recipe is worth every step – it’s so satisfying to see it come together!
Tips for Achieving the Perfect Waffle Cone Texture
Techniques for Crispy and Evenly Cooked Cones
Perfecting the crispy texture of waffle cones requires attention to detail. First, ensure your waffle cone maker is preheated thoroughly for even cooking. Spread the batter evenly to avoid thick or uneven spots, and cook until the cones turn a deep golden brown for that satisfying crunch.
Letting the cones cool completely on a wire rack is crucial, as it helps them crisp up further. If your cones are too soft, try cooking them a bit longer or increasing the heat slightly. For more tips on mastering texture in recipes, check out Gluten-Free Sourdough Bread: How to Get It Right, which shares insights on achieving the perfect balance of moisture and crispness.
Remember, practice makes perfect. Each batch gets easier, and soon your homemade waffle cones will rival any store-bought version – crispy, delicious, and ready to enjoy!
Adjustments for Soft or Crunchy Cones
Tailoring the texture of your waffle cones is easy with a few adjustments. If you prefer a softer cone for certain desserts, reduce the cooking time slightly and keep the heat on medium to retain pliability.
For a super crunchy cone, extend the cooking time slightly, but be careful to avoid burning. Adding a tablespoon of cornstarch to the batter can also enhance crispness while rolling cones tightly while they’re still warm can further refine their texture.
To maintain texture, store finished cones in an airtight container. For additional dessert inspiration and innovative ideas, visit Mini Pancakes Recipes and Ideas for creative ways to enjoy batter-based treats. With these simple tweaks, your waffle cone recipe will perfectly complement any dessert, whether you prefer a soft bite or a satisfying crunch!
Exploring Flavor Variations for Your Waffle Cone Recipe
Adding Chocolate, Vanilla, or Spices to the Batter
Why settle for plain cones when you can make them even more delicious? Adding flavors to your waffle cone recipe is simple and so much fun. Start with a teaspoon of cocoa powder for a subtle chocolate twist. Next, try adding a bit more vanilla extract to enhance the sweetness. For a warm, spiced cone, sprinkle in cinnamon or nutmeg. These little additions make a big difference! In addition, you can mix in finely grated orange zest for a citrusy kick. Just remember not to overpower the batter – a little goes a long way. These flavored cones pair beautifully with all kinds of ice creams, from classic vanilla to rich chocolate. With endless possibilities, experimenting with flavors is a great way to customize your homemade cones. Trust me, once you try these variations, you’ll never want plain waffle cones again!
Creative Mix-Ins to Personalize Your Waffle Cones
Take your waffle cones to the next level by adding mix-ins directly to the batter. First, you can fold in mini chocolate chips for bursts of chocolatey goodness. Next, try mixing in crushed nuts like almonds or pecans for added crunch. In addition, shredded coconut gives a tropical twist to your cones. For a more colorful option, add sprinkles to make the cones extra fun and festive. Just be sure to chop or crush your mix-ins into small pieces, so they don’t interfere with the cooking process. These mix-ins are perfect for turning a classic waffle cone recipe into a unique treat that’s all your own. It’s like creating an edible masterpiece – fun, easy, and customizable! Experiment with different combinations to find your favorite. Your friends and family will be amazed at the delicious results.
Tools and Equipment You Need for a Great Waffle Cone
Choosing the Right Waffle Cone Maker
A good waffle cone maker can make all the difference when creating your cones. First, look for a model with adjustable temperature settings, as this allows you to control the cooking process. Also, non-stick surfaces make cleanup much easier and ensure your batter doesn’t stick. In addition, compact and lightweight designs are perfect for easy storage in your kitchen. If you’re on a budget, there are plenty of affordable options that still deliver great results. Once you have the right waffle cone maker, you’ll be amazed at how simple it is to whip up a batch. It’s the perfect tool to bring this waffle cone recipe to life in your kitchen. Investing in the right equipment means every cone you make will turn out beautifully golden and crispy, with minimal effort.
Handy Accessories for Shaping and Serving
The right accessories can take your waffle cone-making game to the next level. First, a cone roller is essential for shaping your cones quickly and evenly. These tools are easy to use and help give your cones that perfect, professional look. Next, consider using parchment paper or a silicone mat to prevent sticking while you shape. In addition, a cooling rack is handy for letting your cones cool and crisp up after cooking. For serving, colorful paper wrappers can add a fun, festive touch. These little details make the process even more enjoyable and help you impress your guests. With these tools, this waffle cone recipe becomes a breeze to execute, leaving you with beautifully shaped cones every time. Plus, having the right accessories ensures a smooth and stress-free experience from start to finish.
Waffle Cone Pairings: Ice Cream and Beyond
Classic Ice Cream Flavors to Match Your Waffle Cone
There’s nothing better than pairing a classic waffle cone with your favorite ice cream flavors. Start with vanilla – its creamy simplicity complements the cone’s sweetness perfectly. Next, chocolate is always a crowd-pleaser, offering a rich and indulgent taste. In addition, fruity flavors like strawberry or mango bring a refreshing contrast to the cone’s crispy texture. Don’t forget about mint chocolate chip or cookies and cream – they’re fan favorites for a reason! This waffle cone recipe is versatile enough to pair beautifully with any flavor. It’s all about finding the combinations you love most. Whether you keep it classic or get adventurous, the pairing possibilities are endless. So go ahead, scoop up your favorites, and enjoy the perfect match of a homemade waffle cone and creamy ice cream.
Unique Treats and Desserts Served in Waffle Cones
Why limit yourself to just ice cream? Waffle cones are incredibly versatile and can hold all sorts of delicious treats. First, try filling them with fresh fruit and whipped cream for a lighter dessert. Next, consider using them as edible cups for mousse or pudding. In addition, they make a fun serving option for small candies or trail mix at parties. For a savory twist, you can even use cones as a creative way to serve appetizers like dips or cheese. This waffle cone recipe isn’t just for ice cream – it’s a gateway to countless dessert ideas. With a little creativity, you can turn these cones into a centerpiece for any occasion. Your guests will love the unique presentation, and you’ll love how easy it is to wow them.
Frequently Asked Questions (FAQs)
Can you use a waffle maker to make cones?
Yes, you can use a waffle maker to make cones, but there’s a little trick to it. First, use less batter than usual to keep the waffle thin. Next, cook it until golden and flexible, so it’s easy to shape. Once it’s ready, quickly remove it and roll it into a cone shape while it’s still warm. In addition, use a cone mold to get that perfect look. Keep in mind that waffle makers don’t always give the same crispy texture as a waffle cone maker. But with practice, you can still create a great waffle cone recipe!
What ingredients are in waffle cones?
Waffle cones are made with simple ingredients you probably already have at home. First, you’ll need flour as the base. Then, sugar adds sweetness and crunch. Eggs help bind everything together and make the cones rich. Melted butter gives that delicious golden color and flavor. A splash of vanilla extract enhances the taste even more. In addition, you can add a pinch of salt to balance the sweetness. That’s it! With just a few basics, you can create a homemade waffle cone recipe that’s crispy, tasty, and perfect for holding your favorite ice cream.
Can you use pancake mix in a waffle cone maker?
Yes, you can use pancake mix in a waffle cone maker, but it needs a little tweaking. First, reduce the liquid in the mix to make it thicker. This helps create the right texture for cones. Then, add a bit of sugar to give it the signature waffle cone sweetness. In addition, a splash of vanilla extract can enhance the flavor. Cook the batter just like you would with a regular waffle cone recipe. While pancake mix isn’t the traditional choice, it’s a fun and easy way to experiment with making cones at home.
How do you make waffle cones not soggy?
To keep waffle cones crispy and not soggy, start by cooking them thoroughly. First, make sure your cone is golden brown before removing it from the maker. Next, cool the cone completely on a wire rack to prevent steam from softening it. In addition, store your cones in an airtight container to keep moisture out. If they start to lose their crunch, you can crisp them up in a low oven for a few minutes. Following these simple steps will help you create a perfect waffle cone recipe every time – crispy, crunchy, and oh-so-delicious!
Wrap Up Your Waffle Cone Experience with Delicious Creations
Creating your own waffle cones at home is more than just a recipe – it’s a delightful adventure. First, you get to experiment with simple ingredients and watch them transform into crispy, golden cones. Next, you can customize the flavors to suit your taste, making each batch uniquely yours. In addition, pairing these homemade cones with your favorite ice cream or dessert is incredibly satisfying. The process is fun, rewarding, and easier than you might think. Whether it’s your first try or your fiftieth, this waffle cone recipe is sure to bring smiles. So, gather your ingredients, fire up your waffle cone maker, and enjoy the magic of crafting your own sweet creations. You’re going to love the sense of accomplishment – and the delicious results! With this guide, you’re all set to make every dessert a little more special and memorable.

Quick Recap Table of Your Waffle Cone
Making your own waffle cones is easy, fun, and rewarding. You’ll create crispy, golden cones with simple ingredients and clear steps perfect for any dessert. This waffle cone recipe lets you experiment with flavors and enjoy fresh, homemade treats. Start today, and turn any dessert into something truly special!
Here’s the updated Recap Table for your waffle cone recipe with all the requested details:
| Category | Details |
|---|---|
| Ingredients | 1 cup flour, 1/2 cup sugar, 2 eggs, 3 tbsp melted butter, 1 tsp vanilla extract |
| Measures (Per Cone) | Flour: 120 calories, Sugar: 6g fat, 14g carbs, 3g protein per cone |
| Nutritional Values | For Cone: Calories: 120, Fat: 6g, Carbs: 14g, Protein: 3g |
| Summary Instructions | 1. Blurred mix |
| Prep Time | 10 minutes |
| Cook Time | 5 minutes |
| Servings | 8 cones |
Enjoy crafting these delicious cones – they’re quick, fun, and sure to impress after a week’s lunch, holiday lunch, or as an ice cream dessert!
